How to Schedule a WordPress Post
To schedule a WordPress post, open its publishing settings, choose a future date and time, then confirm Schedule. WordPress can handle publication while you are away from the dashboard. The important checks are your website’s timezone, the saved post status, and whether scheduled tasks run reliably on your hosting.
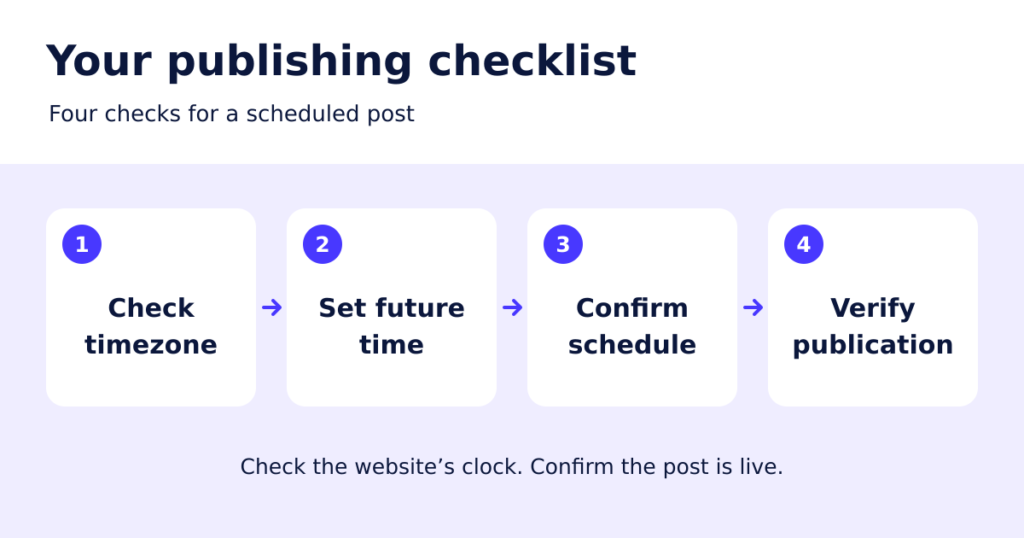
This guide covers the WordPress block editor. Labels may vary slightly with your WordPress version and installed plugins. You do not need an extra plugin for basic scheduling.
1. Check the website’s timezone
Before setting a publication time, go to Settings → General → Timezone. Check that it matches the timezone you intend to use for your publishing calendar. If you cannot access these settings, ask a site administrator to check them.
Choose an appropriate city when available, particularly if your region observes daylight saving time. Save any changes, then compare the displayed local time with the time you expect. WordPress explains this setting in its General Settings documentation.
Treat a timezone change as a site-wide decision. For a shared website, agree on it with the person managing the site, then recheck any posts already scheduled. Changing the date display format does not correct an incorrect timezone.
2. Prepare and preview the post
Open Posts → Add New, or find an existing draft under Posts → All Posts. Finish the title and main content before scheduling. Set an appropriate category, check the URL slug, and add a featured image if your layout uses one.
Use the editor’s preview controls to read the article as a visitor would. Check headings, links, image descriptions, and mobile layout. A scheduled post can still contain unfinished notes, so search for placeholders such as “add link” or “confirm date” before proceeding. The official block-editor guide explains the editor’s main controls.
3. Choose a future date and confirm Schedule
- Open the settings sidebar in the editor’s upper-right corner.
- Select the Post tab rather than the settings for an individual block.
- Find Publish and click the current date or Immediately.
- Choose the future day, month, and year. Enter the hour and minute, checking AM or PM where shown.
- Close the date picker and check the displayed publication time.
- Click Schedule. If a confirmation panel appears, review it and confirm again.
The publishing controls are documented in WordPress’s Post settings reference. After saving, return to Posts → All Posts and verify that the post is marked Scheduled, with the intended date. Choosing a date without completing the scheduling action is not enough.
Example: preparing a weekly community update
Imagine a community group wants an update to appear at 9:00 a.m. on Friday. Its website’s timezone is intentionally set to UTC+3. An editor finishes the article on Wednesday while travelling in another timezone.
The editor should enter Friday at 9:00 a.m. according to the website’s timezone. They should not assume the laptop’s clock determines publication. They preview the finished article, confirm Schedule, and check the saved date in All Posts.
For a coordinated announcement, record the timezone beside the planned time in the team’s calendar. Arrange a publication check before sending readers the link.
4. Edit, reschedule, or cancel
To change the content, reopen the scheduled post, make the edits, and use the editor’s save or update control. Verify the publication time afterward.
To reschedule, open the publishing date, select the replacement future time, and save the change. Reopen the post or check All Posts to confirm the new time persisted.
To cancel automatic publication, change Status to Draft and save. Some versions instead show Switch to draft. Confirm any prompt, then check that the post is listed as Draft. The official scheduling tutorial covers changing and cancelling a schedule.
If plans change shortly before publication, check the public website too. Confirming the saved status is safer than assuming an open editing tab stopped publication.
5. Check that the post actually publishes
WordPress normally uses WP-Cron for scheduled publishing. This task system is triggered by page loads rather than running continuously. On a quiet site, publication can therefore happen later than the selected time. Some hosts configure a separate scheduler. See WordPress’s WP-Cron explanation for the underlying behavior.
If the time passes and the post is still absent:
- Check its status and saved date in All Posts, including the timezone.
- Open the public post URL in a private browser window to distinguish a live post from an editor preview.
- If WordPress shows it as Published but visitors see an old page, investigate your site’s cache.
- If it remains scheduled or reports a missed schedule, ask your host to investigate scheduled-task execution.
For a time-sensitive launch, test scheduling beforehand and plan a manual check. Avoid changing server configuration or installing several scheduling plugins without understanding the cause. Once the article is publicly visible, check its links and layout before announcing it.
If your scheduled article includes a brochure or checklist, follow our guide to adding a downloadable PDF in WordPress and test the file link before scheduling.