Shumac

Author: admin

  • How to Back Up WordPress Before an Update

    How to Back Up WordPress Before an Update

    Before updating WordPress, a theme, or a plugin, create a fresh backup that includes both your website files and its database. Then check that you can recover it. This gives you a usable starting point if an update changes your layout, breaks a feature, or prevents you from signing in.

    This guide is for owners of self-hosted WordPress websites. Hosting dashboards and backup tools differ, so follow your provider’s instructions for the exact buttons. You can start with the backup service or plugin you already have. If you are still setting up your site, see our first WordPress website guide.

    1. Know what a complete WordPress backup includes

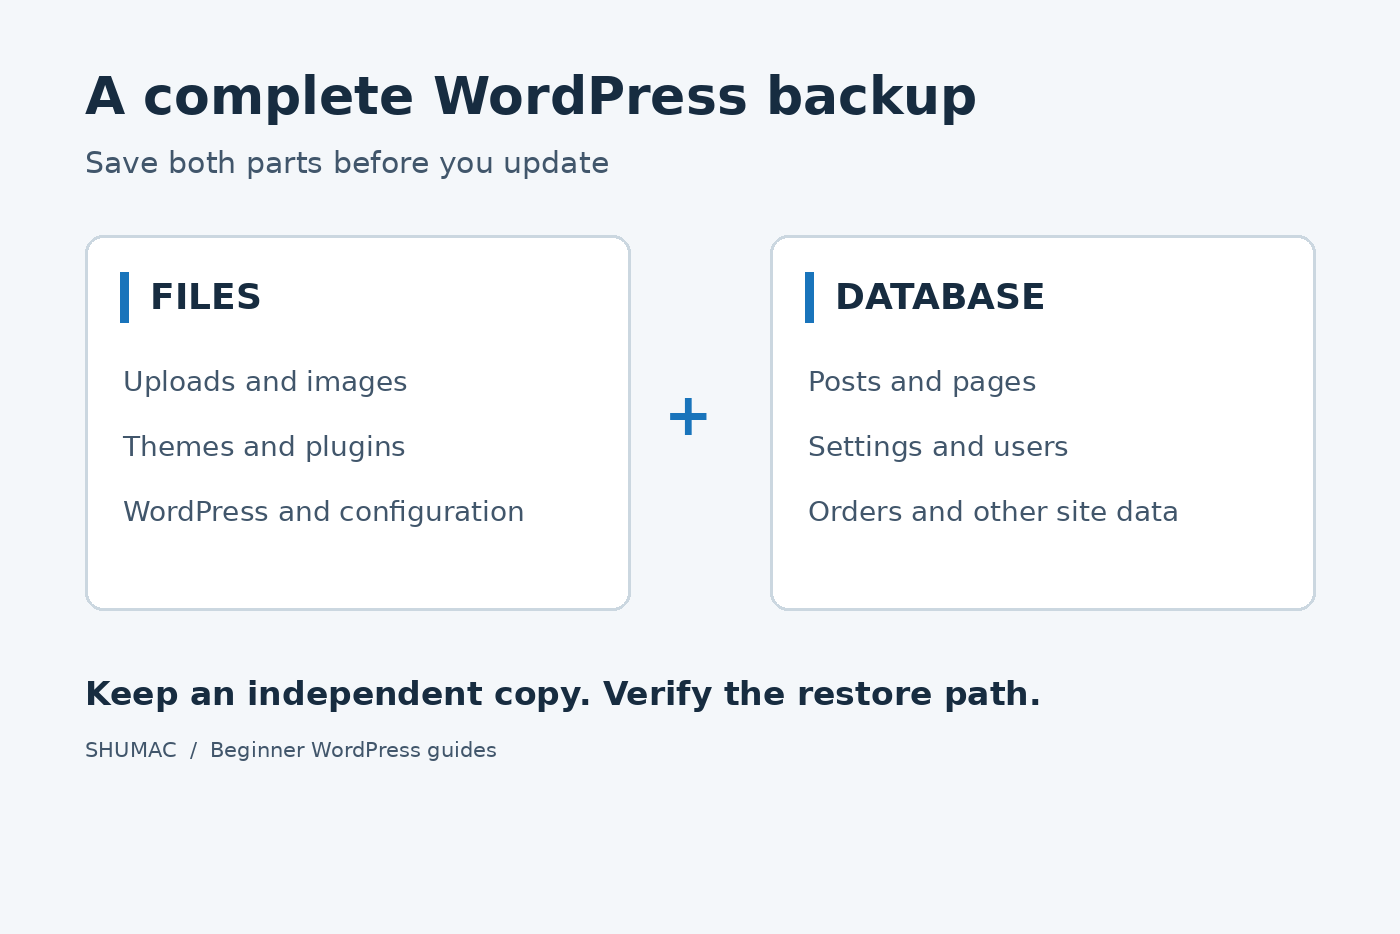
    WordPress stores your website in two main parts:

    • Files: themes, plugins, uploaded images and documents, WordPress software, and configuration files such as wp-config.php. Include custom files and relevant hidden files, such as .htaccess, where your server uses them.
    • Database: posts, pages, settings, user information, and data saved by plugins. Some plugins create additional database tables, so confirm those are included.

    Downloading your website’s folders usually does not include its database. Keep both parts from the same backup period together. The official WordPress backup guide explains why both are needed.

    A common mistake: Tools → Export creates an XML content export. It is useful for moving content, but it does not replace a complete site backup. See what WordPress Export contains.

    2. Choose an existing backup method

    Your hosting provider: Start here if your plan includes backups. Look for a backup or recovery section in your hosting account. Ask whether backups include files and the database, how long copies are retained, whether you can download them, and whether restoration costs extra. Find out how to restore if WordPress itself becomes inaccessible.

    An existing backup plugin: Open its backup settings and confirm its coverage. Check excluded folders, database tables, storage destination, and restore instructions. Some features may require a paid plan. Avoid assuming that a button labelled “backup” includes everything.

    Neither approach is automatically better for every site. Choose the one whose coverage and recovery process you understand. Learn WordPress compares host and plugin backups. If neither is available, ask your host for help before updating; you do not need to install several plugins to solve the problem.

    3. Create and check a fresh backup

    1. Choose a quiet period. Finish pending edits and ask other editors to pause changes during the backup.
    2. Select the correct website. Double-check the domain, especially if your hosting account contains several sites.
    3. Start an on-demand backup. Include files and the complete WordPress database. Check any exclusions before continuing.
    4. Wait for completion. Review the status and any warnings. A scheduled job or progress bar is not a finished backup.
    5. Record the details. Note the date, time, time zone, backup identifier, storage location, and update you intend to make.
    6. Check the output. Confirm every required download completed. Keep split archives together. A plausible file size is a useful check, but does not prove recovery will work.

    For manual backups, use the official guides to backing up files and exporting the database. If you cannot identify the correct database, stop and ask your host.

    4. Store a protected copy elsewhere

    Keep a copy away from the web server, such as in private cloud storage or on an encrypted device. Keep several dated versions rather than repeatedly replacing your only copy.

    Backups may contain personal information and configuration secrets. Restrict access, use encryption where supported, and never place an archive at a publicly accessible website address. WordPress’s security guidance covers backup protection. Also check whether separately hosted email or external services need their own backups.

    5. Check recovery safely

    The strongest practical check is restoring the backup into a separate test environment and inspecting the result. Ask your host to help if you have not done this before. Simply creating a staging copy does not test whether your saved backup restores.

    Protect the test site from public access and search indexing. Confirm it uses a separate database. Before testing forms or checkout, disable real outbound emails and connected automations, and use payment sandbox modes. WooCommerce warns that test orders can trigger emails and integrations.

    Check the homepage, recent posts, images, menus, sign-in, and important forms. Test updates there when possible. A successful staging test reduces uncertainty, but differences from the live server can still matter.

    Be careful with busy sites: restoring an older database can remove newer orders, registrations, or saved submissions. Do not push a staging database over a live shop without a plan to preserve recent activity. WordPress.com’s staging guidance explains this overwrite risk.

    A small example

    Imagine a five-page business website preparing for a theme update. Its owner creates a files-and-database backup, labels it “before-theme-update” with a timestamp, and saves a protected off-server copy. After restoring it to staging, they check the homepage, mobile menu, images, and contact form using test details. They keep that recovery point until the live site passes the same checks after updating.

    Your final pre-update checklist

    • Files and database are included in a completed, recent backup.
    • The backup can be accessed if WordPress stops working.
    • A protected copy exists outside the web server.
    • Restore instructions are available, and a safe restore test is completed where possible.
    • Recent orders or submissions have a preservation plan.

    After updating, check the live site’s important pages and functions. Keep the pre-update backup until you are satisfied everything works, and maintain a regular backup schedule that matches how often your site changes.

  • Build a better homepage with Elementor

    Build a better homepage with Elementor

    Elementor

    Build a better homepage with Elementor

    Practical tips for designing a clear, modern and responsive homepage with Elementor.
    Elementor homepage guide

    Plan the page around a visitor’s question

    A homepage introduces your business and helps visitors decide what to do next. Before opening Elementor, write answers to three questions: Who is this for? What can they get here? What should they do next?

    Turn those answers into a simple order: introduction, offer, useful details and a next action. Include articles when education is part of your business. Include testimonials only when they are real and you have permission to publish them.

    Use containers to organize the layout

    Elementor’s Flexbox containers group widgets and control how they sit beside or below one another. Create one clearly named top-level container for each major section. Inside it, use smaller containers when you need columns or grouped content.

    A row works well for two product cards on desktop. A column is useful for a heading, paragraph and button. Name the containers in the Structure panel so future edits remain manageable: Hero, Plugins, Benefits, Articles and Newsletter are more useful names than a sequence of unnamed boxes.

    Set a consistent visual system

    Choose a content width, a heading style, a body style and a small color palette before adjusting every widget. Keep the strongest color for actions and meaningful highlights. Use a readable text color against your background.

    For a practical starting layout, try a content width near 1,200 pixels with comfortable side padding. Treat that number as a design starting point, not a rule. Review the actual reading width: paragraphs should be easy to follow without scanning across the whole screen.

    Keep related spacing consistent. The gap between a heading and its explanation should usually feel smaller than the space separating two sections. Consistency makes the content easier to understand.

    Build a focused hero

    Write a headline that explains the offer. Add a short supporting sentence and one primary action. A second action can serve visitors who need more information, but avoid giving every link the same visual weight.

    Use a relevant image or product preview. Keep the main headline and button as native Elementor widgets so you can edit them later and visitors can read them as text. A full-page screenshot cannot replace an editable, responsive website.

    Design for smaller screens deliberately

    Use Elementor’s responsive controls to review desktop, tablet and mobile. A layout that works as a row on desktop may need to stack as a column on a phone. Container dimensions and item order can be adjusted for the breakpoint you are editing.

    Check intermediate widths too. A menu can break before the smallest phone view appears. Look for narrow cards, clipped buttons, oversized headings and images that stretch beyond their intended space. Keep important content in a sensible reading order after columns stack.

    Keep shared elements separate

    A shared header and footer should be managed as templates, not copied into every page. That makes a navigation update or a footer-link correction easier to apply consistently. Confirm the display rules so the templates appear where you intend.

    UAE can manage Elementor header and footer templates, while Elementor Pro adds tools such as post grids and forms. Use the tools already responsible for each part of your site instead of creating overlapping versions of the same element.

    Finish with a real visitor check

    Preview the published page in a logged-out browser. Read it from top to bottom, use the menu, follow each button and check the form destination. Look at the page on a real phone when you can.

    Remove unfinished content before calling the page complete. Save a recovery point before major revisions. When improving the page later, change the part that is causing a specific problem instead of rebuilding every section.

    Continue with the official container creation guide and responsive container guide. You can also browse more practical tutorials on the WordPress Blog.

  • How to add WhatsApp chat to your website

    How to add WhatsApp chat to your website

    Plugin Guides

    How to add WhatsApp chat to your website

    Learn how to connect WhatsApp chat to your website in a few practical steps.
    WhatsApp chat guide

    Make starting a conversation easy

    A visitor can be interested in your service and still have one question before taking the next step. A WhatsApp button gives that person a familiar way to contact you. It is especially useful when your sales process begins with a conversation about requirements, availability or the right option.

    Decide who will answer before adding the button. A contact channel is useful when it leads to a conversation you can actually manage. Do not describe it as instant support unless that is how you operate.

    Create a click-to-chat link

    WhatsApp supports links in the format https://wa.me/NUMBER. Replace NUMBER with the full phone number in international format. Use digits only: leave out the plus sign, brackets and spaces, and do not include a local dialing prefix before the country code. The destination number must have an active WhatsApp account.

    A prefilled message can be added using ?text= followed by URL-encoded text. For example, the message “Hello, I have a question” becomes Hello%2C%20I%20have%20a%20question. The visitor still chooses whether to send it.

    Use your own verified business number when creating the real link. Never publish an example number as a working contact.

    Add a clear button in WordPress

    You can place the link on an ordinary button in your page editor. In Elementor, select a Button widget, write “Chat on WhatsApp” and paste your link into its Link control. A plugin is optional for this basic setup.

    Place the button near information that naturally leads to questions: a service description, product explanation or contact section. Avoid placing multiple competing contact buttons in every part of a page. Visitors should understand which action matters most.

    When a chat plugin makes sense

    A contact plugin becomes useful when you need a consistent floating button, multiple contact channels or a more organized team presentation. Before choosing one, write a small requirements list: the channels you actually use, who responds and where the contact launcher should appear.

    Shumac Chat is our plugin project for website contact channels, with a separate Pro add-on. Check its product page and release documentation for the features and availability of a specific version. A showcase image is an illustration of the product experience, not a compatibility guarantee.

    Write a helpful welcome message

    Use a short greeting that tells the visitor what they can ask. For example: “Hello! Tell us which service you are interested in and we will help you with the next step.” A Somali version could be: “Salaan! Noo sheeg adeegga aad xiisaynayso si aan kuu caawinno.”

    Ask only for the information needed to start. A visitor should not have to complete a long questionnaire just to ask about your offer. Explain any response-hour limits where the button or contact details appear.

    Test the complete handoff

    Test the link on a phone and a desktop computer. Confirm that it opens the intended account and that the prefilled text reads naturally. Try the page while logged out and check that a floating launcher does not cover navigation, consent controls or the checkout action.

    • Verify the destination number digit by digit.
    • Check the button label and readable contrast.
    • Check that the launcher remains reachable on small screens.
    • Confirm that someone is responsible for the incoming conversation.

    Keep sensitive details out of a prefilled message. Once a visitor opens WhatsApp, they are continuing through that service. Make the transition clear and give people another contact route when practical.

    Official reference and next step

    See WhatsApp’s official click-to-chat guide for the link format. Explore Shumac Chat or visit our Support page if you need help choosing a setup.

  • Your first WordPress website: a practical guide

    Your first WordPress website: a practical guide

    Getting Started

    Your first WordPress website: a practical guide

    A simple, step-by-step guide to getting your WordPress site up and running.
    WordPress website guide

    Start with one clear purpose

    Your first website does not need every feature you have seen online. It needs to help a particular person take a useful next step. For a tutor, that might be exploring a course. For a local business, it might be requesting a quote. For a writer, it might be reading an article and subscribing.

    Write one sentence before you choose a theme: “This website helps [audience] to [outcome].” Keep it beside you while you build. If a section does not support that sentence, leave it for a later version.

    Prepare your content before the layout

    Create a short document with your business name, a plain-language description, your main offer and the action you want visitors to take. Gather your logo and images you have permission to use. Write the answers to the questions people already ask you.

    Start with Home, About and Contact. Add a Services or Products page when your offer needs more explanation. Use a Blog for articles you plan to publish regularly. Clear, finished content is more useful than a large menu of empty pages.

    Set up your WordPress foundation

    A domain is your website address. Hosting provides the server space that runs the site. Choose an arrangement you can manage and recover, and keep the domain account in your own control. Enable HTTPS through your hosting setup before inviting visitors.

    After installing WordPress, review the site title, administrator account and general settings. Use a strong, unique password. Create a backup before making substantial changes so you have a practical recovery point.

    Choose a theme and add only what you need

    Your theme provides the visual foundation. A plugin adds a feature. Before installing a plugin, identify the problem it will solve and check its compatibility information. You can browse plugins through Plugins → Add New, or upload a ZIP through the dashboard when the developer supplies one.

    Keep a simple list of what each active plugin does. If two tools solve the same problem, decide which one owns that job. A deliberate setup is easier to explain, maintain and troubleshoot.

    Build Home and connect your navigation

    A useful homepage can be short: a clear headline, a description of the offer, a few relevant benefits and a visible next action. Put important information in editable text rather than embedding it inside a large image.

    Publish your Home page, then open Settings → Reading. Select A static page and choose Home as the homepage. If your theme uses a standard posts archive, you can assign an empty Blog page there too. An Elementor page with its own Posts widget is a different setup; keep it as a regular page so its designed layout is used.

    Add the important pages to your navigation. Use obvious labels such as Home, Services, Blog and Contact. Visit each link after saving.

    Test the visitor journey before launch

    Open the site on a phone and a larger screen. Can you read the headline without zooming? Do buttons fit? Does the menu open and close? Check the page as a visitor who is logged out.

    • Read every heading and remove placeholder text.
    • Follow every menu and call-to-action link.
    • Check that images have useful alternative text.
    • Test any form you own and confirm where its submission arrives.
    • Make sure the recovery backup is available.

    Launch a useful first version, then improve it using the real questions your visitors bring you. Your next task is not to add more decoration. It is to make the next step clearer.

    Continue learning